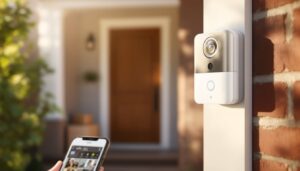
Most homes have a single thermostat controlling the temperature for every room, which means your bedroom might be freezing while the kitchen feels like an oven. A Nest thermostat remote sensor solves this problem by letting your smart thermostat read temperatures from multiple zones in your home. Whether you’re dealing with a poorly insulated guest room, a drafty upper floor, or just want more precise climate control, understanding how these sensors work and why they matter can save you money on energy bills while keeping everyone comfortable. This guide walks you through the basics, installation, and troubleshooting so you can get the most out of your Nest setup.
Table of Contents
ToggleKey Takeaways
- A Nest thermostat sensor is a wireless, battery-powered device that enables multi-room temperature monitoring and helps eliminate hot and cold spots throughout your home.
- Installing remote sensors can reduce energy consumption by 10–15% compared to single-sensor systems while improving comfort across different zones.
- Proper placement is critical for accuracy—mount sensors at the center of rooms, 4–6 feet off the floor, away from direct sunlight, drafts, and heat sources.
- The installation process takes just 20–30 minutes and requires only two AA alkaline batteries, basic mounting hardware, and the Nest app for configuration.
- Connection issues are typically resolved by replacing batteries with fresh alkalines, restarting the app pairing process, or moving the sensor closer to your thermostat.
- Remote sensors enable intelligent scheduling that shifts heating and cooling priority to occupied rooms, adding up to significant savings over a full heating or cooling season.
What Is a Nest Thermostat Sensor and How Does It Work
A Nest temperature sensor is a wireless, battery-powered device that measures room temperature and occupancy in areas away from your main thermostat. Unlike the built-in sensor inside your Nest thermostat unit, a remote sensor sends real-time temperature data to your thermostat so it can make smarter heating and cooling decisions across your entire home.
The sensor uses a small wireless signal to communicate with your Nest device, no extra wiring required. When you place a sensor in a bedroom, office, or any other room, your Nest learns which spaces matter most and adjusts your HVAC system to maintain your target temperature across multiple zones instead of just the spot where the thermostat lives. Most Nest sensors also detect whether someone’s in the room (via occupancy sensing), so your system can be smarter about when to heat or cool specific areas.
Setup is straightforward: the sensor runs on two AA batteries that typically last about two years before needing replacement. It’s compact, roughly the size of a small picture frame, so it fits on a shelf, nightstand, or desk without being obtrusive.
Why Remote Sensors Matter for Your Home Climate Control
Temperature inconsistency across a home is one of the most common complaints homeowners have, and it often stems from a single thermostat trying to serve multiple zones. When your main thermostat sits in a hallway or living room, it doesn’t “see” temperature differences in bedrooms, basements, or upper floors. Your heating or cooling system runs based only on what that one sensor reads, leaving some rooms uncomfortable.
With remote sensors, your Nest system becomes zone-aware. It can balance heating and cooling across the whole house, prioritizing the rooms you occupy most while reducing energy waste in unused spaces. This leads to two tangible benefits: better comfort and lower utility bills. Studies on smart thermostat efficiency show that multi-room temperature management can reduce energy consumption by 10–15% compared to single-sensor systems.
Remote sensors also enable more intelligent scheduling. If a room with a sensor hasn’t detected activity in two hours, your Nest can shift heating and cooling priority to occupied zones. Over a heating season or cooling cycle, this adds up to real savings without sacrificing comfort when you actually need it.
Improving Temperature Accuracy in Multi-Room Homes
In a two-story house or one with a finished basement, temperature naturally stratifies, heat rises, basements stay cooler. A single thermostat mounted on the main floor may read 72°F while upstairs is 78°F and the basement is 68°F. Your system runs constantly trying to satisfy one reading while ignoring the others.
Adding sensors to your upstairs bedroom, home office, or basement solves this. You can now tell your Nest which room’s temperature matters most at different times of day. During the morning routine, prioritize the master bedroom: during work hours, prioritize the office. The system uses this data to adjust airflow and run times so all monitored zones trend toward your target temperature. It won’t be perfect, that would require zoned HVAC (dampers in ductwork), which is a different project, but remote sensors dramatically reduce temperature swings and dead zones in most homes.
Installation and Setup for Your Nest Sensor
Before you buy, confirm your Nest thermostat is compatible. Nest temperature sensors work with most modern Nest thermostat models, but older units or non-Nest smart thermostats won’t recognize them. Check your thermostat model or the Nest app to verify compatibility, it’s a 60-second check that saves frustration.
You’ll need a Phillips head screwdriver (or battery-powered drill with a Phillips bit) to mount the sensor on a wall, though some people just rest it on a shelf or nightstand instead. Do not mount a sensor directly behind a door, in direct sunlight, or near heat sources like a radiator or lamp: these placements skew temperature readings. Aim for a spot at roughly the center of the room, 4–6 feet off the floor, and away from drafts.
Power comes from two standard AA alkaline batteries, not rechargeable lithium or NiMH, which can cause erratic performance. Many people skip the batteries initially and just pop them in later when they’re ready to activate: the sensor ships with batteries included anyway.
Step-by-Step Installation Instructions
-
Unbox and inspect. Remove the sensor and back plate from the packaging. Check that two AA batteries are present and that nothing appears damaged.
-
Choose your location. Pick a room that feels inconsistent in temperature or where you spend significant time. Avoid kitchens (too many heat sources), bathrooms (humidity), or laundry rooms (interference). A bedroom, office, or living room is ideal.
-
Mount or place the sensor. If mounting to drywall, use the included wall plate and screws. Drill pilot holes with a 1/8-inch bit first to avoid cracking drywall. The plate mounts vertically with the sensor facing outward. If you prefer not to drill, simply place the sensor on a sturdy, level shelf at a similar height.
-
Install batteries. Pop the battery cover off the back of the sensor (usually a small tab you slide or twist). Insert two AA batteries, matching the polarity markers inside. Replace the cover.
-
Add the sensor in the Nest app. Open the Nest app on your phone. Navigate to your thermostat settings, then select “Add Accessory” or “Connect Sensor.” The app will search for nearby sensors. Once found, name the sensor (e.g., “Master Bedroom,” “Basement”) and assign it to a room.
-
Test the connection. The app confirms when your sensor is connected. Wait 5–10 minutes and check that the app displays a temperature reading from the new sensor. If nothing appears, move the sensor closer to your thermostat (wireless range is typically 100–150 feet through walls, but interference from Wi-Fi routers or other devices can reduce this).
-
Set temperature preferences. In the Nest app, you can now control which sensors your thermostat considers when deciding to heat or cool. Some thermostats let you weight sensors (e.g., “Master Bedroom matters 60% of the time, Living Room 40%”). Start with equal weighting and adjust based on your comfort.
The whole process takes about 20–30 minutes, including the wireless pairing. Once installed, sensors require minimal maintenance, just swap out batteries every couple of years when the app notifies you of low power.
Troubleshooting Common Nest Sensor Issues
Even simple wireless devices occasionally act up. Here are the most common problems and how to fix them.
Sensor not connecting to the thermostat. This usually means the sensor is out of wireless range or the batteries are dead. Replace the batteries with fresh AA alkalines, then restart the pairing process in the Nest app. If it still won’t connect, move the sensor closer to the thermostat temporarily to rule out a range issue. Some users report that restarting their home Wi-Fi router helps too. According to guidance on setting up Nest sensors, moving the sensor to a central location within your home often solves connection problems.
Temperature readings seem inaccurate. Sensors drift when placed in direct sunlight, near heating vents, or next to a lamp or stove. Even if a spot feels convenient, if the reading is always 3–4°F off compared to a standalone thermometer, relocate the sensor. Allow 15 minutes after moving for readings to stabilize.
Thermostat ignoring the sensor. Open the Nest app and confirm the sensor is still listed under your thermostat settings. If it is, check that the sensor weighting isn’t set to 0%, an easy mistake if you’re adjusting settings. Also verify you haven’t disabled the sensor accidentally in the app menu.
Batteries draining quickly. Alkaline batteries in a Nest sensor typically last two years, but some last only six months if your home’s wireless network is congested. Switch to a less crowded Wi-Fi channel (your router settings allow this) to reduce the sensor’s power draw. If problems persist, try a different brand of AA battery, sometimes cheaper batteries underperform.
Erratic temperature swings after adding a sensor. This is common when you first introduce a new sensor because your thermostat is learning how to balance multiple rooms. Give it 24–48 hours to settle. If swings continue, manually adjust the sensor’s weight in the app to reduce its influence. You can also review troubleshooting steps and optimization tips in Nest’s official resources to fine-tune performance.
Conclusion
A Nest thermostat remote sensor is a low-cost, easy-to-install upgrade that transforms how your smart thermostat works. By adding awareness of temperatures in rooms beyond your main thermostat, you gain both comfort and efficiency. Installation takes less than an hour, troubleshooting is straightforward, and the payoff, warmer winters, cooler summers, and lower energy bills, is real. If your home has temperature dead zones or you’re tired of adjusting the thermostat every time you move between rooms, remote sensors are worth the investment.